> ## Documentation Index
> Fetch the complete documentation index at: https://ziva.zeleza.ru/llms.txt
> Use this file to discover all available pages before exploring further.
# Quick Start
> Create your first TUI application with Ziva in 5 minutes
# Quick Start
In this guide, we'll create a simple TUI application demonstrating the main features of Ziva.
 ## Step 1: Create Project
Create a new Go project:
```bash theme={null}
mkdir ziva-demo
cd ziva-demo
go mod init ziva-demo
go get github.com/qzeleza/ziva
```
## Step 2: Basic Application
Create a `main.go` file:
```go theme={null}
package main
import (
"fmt"
"log"
"time"
"github.com/qzeleza/ziva"
)
func main() {
// Create task queue with title
queue := ziva.NewQueue("Ziva Demo Application")
// Configure appearance
queue.WithAppName("MyApp")
queue.WithTasksNumbered(false, "[%d]")
// Create tasks
createTasks(queue)
// Run the queue
if err := queue.Run(); err != nil {
log.Fatal(err)
}
// Show results
printResults()
}
func createTasks(queue *ziva.Queue) {
// 1. Confirmation task with timeout
confirm := ziva.NewYesNoTask("Confirmation", "Start setup?").
WithTimeout(5*time.Second, "Yes")
// 2. Environment selection
environments := []ziva.Item{
{Key: "development", Name: "development", Description: "Development environment"},
{Key: "staging", Name: "staging", Description: "Testing environment"},
{Key: "production", Name: "production", Description: "Production environment"},
}
env := ziva.NewSingleSelectTask("Environment Selection", environments).
WithDefaultItem("staging")
// 3. Component selection
components := []ziva.Item{
{Key: "api", Name: "api", Description: "REST API server"},
{Key: "web", Name: "web", Description: "Web interface"},
{Key: "cli", Name: "cli", Description: "Command line"},
{Key: "docs", Name: "docs", Description: "Documentation"},
}
comp := ziva.NewMultiSelectTask("Components", components).
WithSelectAll("Select all").
WithDefaultItems([]string{"api", "cli"})
// 4. Project name input with validation
name := ziva.NewInputTask("Project Name", "Enter name:").
WithValidator(ziva.DefaultValidators.Required())
// 5. Functional task
setup := ziva.NewFuncTask("Setup", func() error {
time.Sleep(2 * time.Second) // Work simulation
return nil
}, ziva.WithSummaryFunction(func() []string {
return []string{"Configuration created", "Project ready"}
}))
// Add all tasks to queue
queue.AddTasks(confirm, env, comp, name, setup)
}
func printResults() {
fmt.Println("\n🎉 Application completed!")
fmt.Println("Results are stored in task objects.")
}
```
## Step 3: Run
Run the application:
```bash theme={null}
go run main.go
```
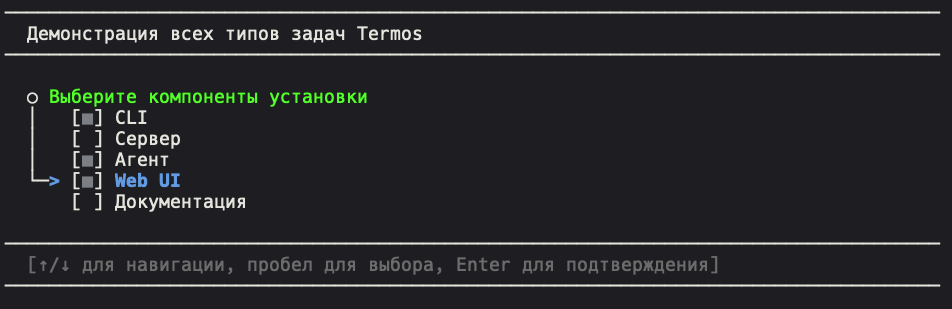
You'll see an interactive interface with different types of tasks.
## Step 4: Working with Results
Extend the example to work with results:
```go theme={null}
func printResults(confirm *ziva.YesNoTask, env *ziva.SingleSelectTask,
comp *ziva.MultiSelectTask, name *ziva.InputTask) {
fmt.Println("\n📋 Configuration Results:")
fmt.Printf("Confirmation: %v\n", confirm.IsYes())
fmt.Printf("Environment: %s\n", env.GetSelected()) // returns key
fmt.Printf("Components: %v\n", comp.GetSelected()) // list of keys
fmt.Printf("Project name: %s\n", name.GetValue())
}
```
And update main:
```go theme={null}
func main() {
queue := ziva.NewQueue("Ziva Demo Application")
// Create tasks with preserved references
confirm, env, comp, name := createTasksWithReferences(queue)
if err := queue.Run(); err != nil {
log.Fatal(err)
}
// Show results
printResults(confirm, env, comp, name)
}
```
## Core Concepts
### Task Queue
The central component that manages sequential task execution:
```go theme={null}
queue := ziva.NewQueue("Title")
queue.WithAppName("MyApp") // Application name
queue.WithClearScreen(true) // Screen clearing
queue.WithTasksNumbered(true, "[%02d]") // Task numbering
```
### Task Types
1. **YesNoTask** - Yes/No choice
2. **SingleSelectTask** - Single option selection
3. **MultiSelectTask** - Multiple option selection
4. **InputTask** - Text input with validation
5. **FuncTask** - Function execution
### Timeouts
All tasks support timeouts with default values:
```go theme={null}
task.WithTimeout(10*time.Second, defaultValue)
```
### Validation
Built-in validators for various data types:
```go theme={null}
v := ziva.DefaultValidators
inputTask.WithValidator(v.Email()) // Email
inputTask.WithValidator(v.IP()) // IP address
inputTask.WithValidator(v.MinLength(5)) // Minimum length
```
## What's Next
Explore all available components in detail
Learn about the data validation system
Customize application appearance
Study advanced usage examples
## Step 1: Create Project
Create a new Go project:
```bash theme={null}
mkdir ziva-demo
cd ziva-demo
go mod init ziva-demo
go get github.com/qzeleza/ziva
```
## Step 2: Basic Application
Create a `main.go` file:
```go theme={null}
package main
import (
"fmt"
"log"
"time"
"github.com/qzeleza/ziva"
)
func main() {
// Create task queue with title
queue := ziva.NewQueue("Ziva Demo Application")
// Configure appearance
queue.WithAppName("MyApp")
queue.WithTasksNumbered(false, "[%d]")
// Create tasks
createTasks(queue)
// Run the queue
if err := queue.Run(); err != nil {
log.Fatal(err)
}
// Show results
printResults()
}
func createTasks(queue *ziva.Queue) {
// 1. Confirmation task with timeout
confirm := ziva.NewYesNoTask("Confirmation", "Start setup?").
WithTimeout(5*time.Second, "Yes")
// 2. Environment selection
environments := []ziva.Item{
{Key: "development", Name: "development", Description: "Development environment"},
{Key: "staging", Name: "staging", Description: "Testing environment"},
{Key: "production", Name: "production", Description: "Production environment"},
}
env := ziva.NewSingleSelectTask("Environment Selection", environments).
WithDefaultItem("staging")
// 3. Component selection
components := []ziva.Item{
{Key: "api", Name: "api", Description: "REST API server"},
{Key: "web", Name: "web", Description: "Web interface"},
{Key: "cli", Name: "cli", Description: "Command line"},
{Key: "docs", Name: "docs", Description: "Documentation"},
}
comp := ziva.NewMultiSelectTask("Components", components).
WithSelectAll("Select all").
WithDefaultItems([]string{"api", "cli"})
// 4. Project name input with validation
name := ziva.NewInputTask("Project Name", "Enter name:").
WithValidator(ziva.DefaultValidators.Required())
// 5. Functional task
setup := ziva.NewFuncTask("Setup", func() error {
time.Sleep(2 * time.Second) // Work simulation
return nil
}, ziva.WithSummaryFunction(func() []string {
return []string{"Configuration created", "Project ready"}
}))
// Add all tasks to queue
queue.AddTasks(confirm, env, comp, name, setup)
}
func printResults() {
fmt.Println("\n🎉 Application completed!")
fmt.Println("Results are stored in task objects.")
}
```
## Step 3: Run
Run the application:
```bash theme={null}
go run main.go
```
You'll see an interactive interface with different types of tasks.
## Step 4: Working with Results
Extend the example to work with results:
```go theme={null}
func printResults(confirm *ziva.YesNoTask, env *ziva.SingleSelectTask,
comp *ziva.MultiSelectTask, name *ziva.InputTask) {
fmt.Println("\n📋 Configuration Results:")
fmt.Printf("Confirmation: %v\n", confirm.IsYes())
fmt.Printf("Environment: %s\n", env.GetSelected()) // returns key
fmt.Printf("Components: %v\n", comp.GetSelected()) // list of keys
fmt.Printf("Project name: %s\n", name.GetValue())
}
```
And update main:
```go theme={null}
func main() {
queue := ziva.NewQueue("Ziva Demo Application")
// Create tasks with preserved references
confirm, env, comp, name := createTasksWithReferences(queue)
if err := queue.Run(); err != nil {
log.Fatal(err)
}
// Show results
printResults(confirm, env, comp, name)
}
```
## Core Concepts
### Task Queue
The central component that manages sequential task execution:
```go theme={null}
queue := ziva.NewQueue("Title")
queue.WithAppName("MyApp") // Application name
queue.WithClearScreen(true) // Screen clearing
queue.WithTasksNumbered(true, "[%02d]") // Task numbering
```
### Task Types
1. **YesNoTask** - Yes/No choice
2. **SingleSelectTask** - Single option selection
3. **MultiSelectTask** - Multiple option selection
4. **InputTask** - Text input with validation
5. **FuncTask** - Function execution
### Timeouts
All tasks support timeouts with default values:
```go theme={null}
task.WithTimeout(10*time.Second, defaultValue)
```
### Validation
Built-in validators for various data types:
```go theme={null}
v := ziva.DefaultValidators
inputTask.WithValidator(v.Email()) // Email
inputTask.WithValidator(v.IP()) // IP address
inputTask.WithValidator(v.MinLength(5)) // Minimum length
```
## What's Next
Explore all available components in detail
Learn about the data validation system
Customize application appearance
Study advanced usage examples